ON THE ROAD | PROPANE GRILL | RESOURCES | LOCAL FARMS | BE ORGANIZED | ELECTRIC BURNER | ELECTRIC KETTLE | PEST-FREE | KNIFE STORAGE |CONSERVE WATER | MEAT THERMOMETER | CROCK-POT
Weber Q 1000 Gas Grill.Roast your turkey while you bake scalloped potatoes inside your rig. If you haven’t already learned that you can cook lots more than a steak on your grill, buy a Weber cookbook and you’ll get a whole new appreciation for all you can cook outside.

If you think you can’t prepare really good meals in your motorhome kitchen, you’re flat-out wrong. Read how to do it right here.
COOKING ON THE ROAD: Before deciding whether to consider following my suggestions about cooking, you must make a threshold determination: Are you going to even make an effort to prepare good meals while traveling? Although I personally can’t fathom it, some folks decide “not to bother.” They rationalize their decision by claiming that their RV Kitchen is too small, there’s not enough room to take much cookware or that there’s so much to do that they don’t want to “waste time” in the kitchen. To these folks I say: “Have a nice day…proceed to my next travel tip. Enjoy your peanut butter sandwiches and cold cereal.” To me, cooking couldn’t be further from a “waste of time.” To the contrary, those of us who enjoy cooking get a great deal of satisfaction preparing meals for our friends and loved ones. Cooking is truly a gift to them. We all need to eat…why not make dining on the road an opportunity for interesting conversation and a delight to the senses? It really isn’t difficult by using your slow cooker or Pepperidge Farms puff pastry, for example, to “wow” your neighbors at the Friday night potluck dinner. Contribute a made-from-scratch dessert rather than a tuna-surprise casserole. Stock your kitchen with an apple slicer, hard cooked egg slicer and some garnishing tools. They don’t take any space at all, and making your meals look as good as they taste is easy and fun. That’s my take on it.
Now, having said that, there are obvious limitations when one’s kitchen is as small as a postage stamp and, obviously, we can’t bring all our cookware and knife sets. But that doesn’t mean we can’t prepare one heck of a great meal. In just the last couple of months, I’ve prepared a complete traditional Thanksgiving dinner and I’ve grilled prawns and served them with hot mustard and drawn butter, along with fresh steamed vegetables and salt-baked potatoes. I finished that meal with made-from-scratch fruit cobbler topped with ice cream. On another occasion, I prepared the best prime rib of all time and had popovers and freshly grated horseradish sauce and “au jus” to boot. I could go on and on, but you get the idea. I guarantee you can take your passion for cooking with you on your adventure. So, here are my suggestions and tips:

Veggies from a roadside stand were probably grown just a few miles away. Produce in the supermarket may have been trucked 3,000 miles to reach you.
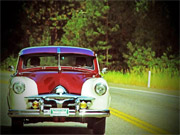
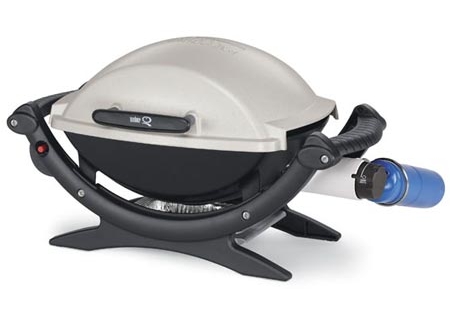
TIP NUMBER 1: BE ABSOLUTELY SURE TO TAKE A SMALL PROPANE GRILL WITH YOU. I always grill at home with hardwood, but it’s not practical to do so on the road. And surprisingly, I’ve been pretty impressed with using a gas grill. Most of us use a medium size Weber grill. See the Q 1000, pictured. It must be one with a cover, so you can roast and slow-cook as well as grill directly. That feature greatly expands the uses to which you can put the thing. Now you’ve got two ovens: One inside and the other outside. Almost like home!
TIP NUMBER 2: USE ONLINE COOKING RESOURCES.I collect cookbooks…about 500 of them at last count. At home I have a library and the shelves are filled almost exclusively with them. Can’t do this in your RV, of course. So what’s the answer?
You already know that there are lots of good recipes-online websites, but let me suggest a few specifically that won’t disappoint you: www.food.com, formerly Recipezaar is one of the best. Not only does it contain thousands of subscriber-provided recipes which are well categorized and include photos, nutritional information and side dish recommendations, but you can publish and save all of your own favorite recipes so you can access them without your books. Over the years I’ve made “online friends” with other chefs who belong to the site. I can contact them directly to “discuss” cooking issues or get suggestions. Some of these friends are even notable. I chat frequently with some of those who competed in the TV Top Chef series, for example. Most of them are successful restaurant owners and it’s very cool being able to get ideas from them. I’m amazed how willing these busy professionals are to spend time with an amateur like myself. Another very good website is www.MoreThanGourmet.com. You get the idea.
TIP NUMBER 3: SHOP AT LOCAL FARMS along your route for fresh vegetables and for the opportunity to meet more of those “interesting Americans.” as you travel. The difference between supermarket produce and locally produced is significant. Purchase your seafood from your local fish monger whose fish were swimming just a few hours ago. Buy your steaks from a meat market in Kansas near the stock yards. Getting your ingredients this way is lots more fun than going to the local Safeway. You’ll have a chance to meet the farmers and ranchers who actually produce the food…and experience a bit of Americana. 
TIP NUMBER 4: GET ORGANIZED. Clean as you go. This is good advice for anyone preparing food in any kitchen, but it’s of vital importance in your motor-home. Even the largest and best equipped ones have severe space limitations and without being organized, having a plan and cleaning as you go you’re going to have a huge mess that overflows from your kitchen into the other living areas. Also, after the meal, there will be a lot of clean-up. This is no fun, ever, for anyone, no matter how much you like working in the kitchen. Assemble in advance the pots and pans and other cooking utensils you will need. If you’re working from a recipe, print it and have it before you. Pre-measure all the liquid and dry ingredients you’ll need. When you complete one step in the process and for example as you’re waiting for water to come to a boil, quickly wash what you’ve already used and put it away. From my experience cooking at home and doing a bit of catering work, this method is the only way to efficiently work in your kitchen. And this process is far more important when cooking in your RV kitchen. Once you begin cooking this way, it will become routine and you’ll be glad you followed this suggestion. There’s not a restaurant kitchen in the world that doesn’t operate this way. I’ve been lucky enough to spend “ride-along time” with Executive Chefs at several fine restaurants. Food leaving the kitchen wouldn’t get to your table quickly or properly without the behind-the-scenes organization I’ve described. If all of this seems like “overkill” for your use in the RV, think again. Even on a very small scale, and perhaps even more so, these habits will serve you well.
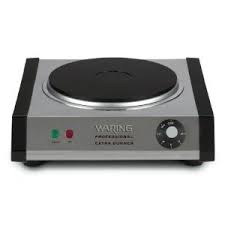
Waring Professional Extra Burner.
TIP NUMBER 5: USE AN EXTRA ELECTRIC BURNER which can be stored right on your counter. There will be plenty of space because your gas burners will be covered! Most kitchen stove-tops have three burners under the counter top, and it must be removed to access the burners. Once the counter top is removed, you have to find a place to put it while you’re cooking and you have a lot less counter space to use. For most meals, prep will only require one burner, especially when you also have the oven and your Weber grill. And in the unlikely event you are ever cooking for a crowd, you’ll have four burners and essentially two ovens. I like the Waring Professional Extra Burner, pictured.
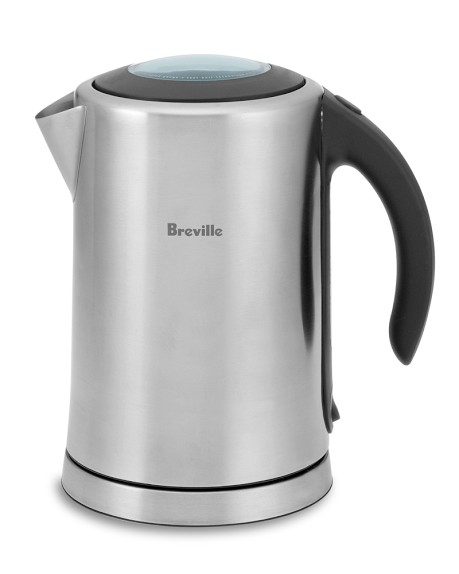
Breville Electric Kettle
TIP NUMBER 6: CONSIDER AN ELECTRIC KETTLE to also be placed on your kitchen counter. I’ve used the Breville electric cordless kettle at home for years. It’s super for quickly heating water for pour-over coffee, hot cocoa and lots of other uses for boiling water. I decided to bring it along on our trip and I’m already glad I did. Remember, I’ve already suggested that you keep your gas burner counter cover on unless it’s absolutely necessary to cook with gas. This saves lots of counter space that would otherwise be sacrificed. If you do this and use a commercial grade extra electric burner, you will need another way to heat water. The Breville will serve you well. Take a look at it here, by clicking the Amazon link. As you’ll see, a staggering 563 + kettle owners have been very happy with the kettle. Now, I’ve been suggesting ways to keep as much counter space as possible, so why add yet another kitchen electric appliance? You can have it both ways. All you’ll need on your counter is the extra electric burner and the Breville kettle, together of course with your coffee maker and grinder. You’ll have lots of space left on the counter. You’ll be equipped to cook most meals. You’ll be saving LPG fuel, as well. And all the while, the huge gas burner counter-cover will remain on the counter. (My over the counter oven can also toast bread, so you won’t need a conventional toaster.)
Melitta Ready Joe plastic filter. About $5 from Amazon.
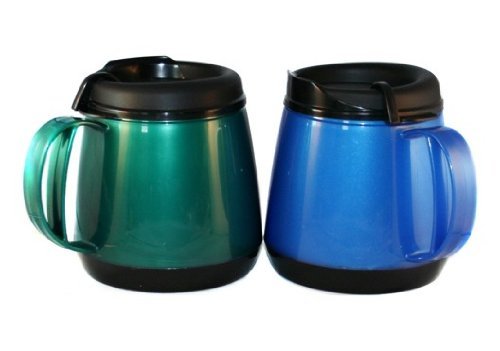
And try these “wide body thermo serve mugs” from Amazon. They keep your coffee piping hot for a very long time. And as with the Melitta filter, these mugs are light as a feather and virtually indestructible.
7. COFFEE…AS GOOD AS IT GETS! Florence and I are truly “coffee snobs,” and we weren’t about to let the limitations of motorhome life prevent us from being able to continue brewing exceptionally good coffee every day. At home we use a Technivorm machine, but given the need to preserve precious kitchen counter space, using it was no longer a viable option. And the French Press system leaves you with left-over grounds and the dilemma of what to do with them. Even after they go into the trash, there will be lots left over that go down your drain when the filter is being rinsed. They can easily contaminate and clog your grey water tank. The Kuerig system makes pretty good coffee without the problem of coffee grounds disposal, but at about a dollar a cup that’s not a viable solution if you drink a lot of coffee. Here’s the way to go: Make your coffee using the “pour-over” system. All it requires is an inexpensive filter cone that will only set you back about 5 bucks and a supply of paper filters. Any barista worth her salt will tell you that pour-over coffee is the best! And the resulting grounds are in a paper filter so they go straight to the trash without any remaining to go down the drain and contaminate your grey water tank. Now, there are three elements that go into making a good cup of coffee: quality roasted beans that have been freshly ground, good chemical-free drinking water and a brewing system that efficiently extracts the flavor of the beans being used. Relatively good whole beans are widely available and we splurge on beans from Stumptown Coffee Roasters in Portland, Oregon from time to time. We grind them with a quality burr grinder, which does take up counter space but is a necessity. You need to grind right before brewing. Purchasing ground coffee doesn’t get it. If you’ve taken my advice about the Breville Electric Kettle you’re all set with piping hot water. Good drinking water is easy to find… and now we get to the pour-over piece. We use a Melitta Red Ready Joe plastic filter. There are some good porcelain filters on the market, but they’re pretty hefty and space consuming. The Melitta is light as a feather, virtually indestructible and has a “viewing area” that allows you to see when your cup is full and it’s time to remove the filter. And that’s all there is to it. Try it. What the heck…get a couple of ’em. For $5 it’s not much of a risk and I think you’ll be pleasantly surprised. And if you’re making coffee for a crowd, you can purchase a large plastic filter that will fit a thermos and allow you to pour-over brew lots more than just a cup at a time.
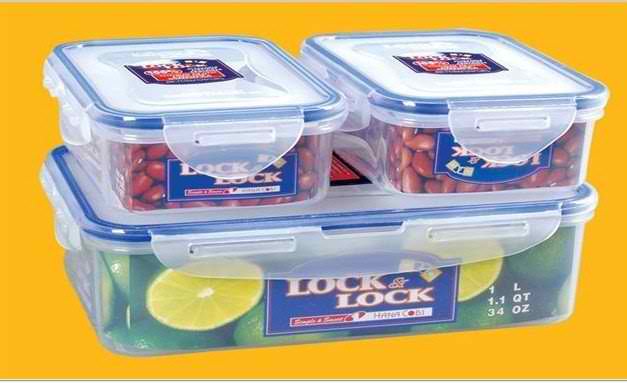
Keep your dry goods and leftovers sealed tight as a drum. Get “Lock and Lock” stackable airtight containers. Pay the few extra bucks for them. You’ll be glad you did!
TIP NUMBER 8: KEEP YOUR FOOD AND YOUR RV PEST-FREE. As you probably know, all RV’s are likely to have unwanted visitors from time to time, despite your best efforts. Mice, ants, house flies, racoons and a bevy of other insects and animals seem determined to invade our space, eat our food and generally annoy the hell out of us. It just goes with the territory considering where we park our rigs and how they are stocked. There are some things you can do to minimize the risk of invasion.
First, consider food storage. We’ve learned that it’s wise to keep all food other than canned good and what’s in the fridge, stored in airtight containers. We’ve tried them all and concluded that there is one absolutely superior brand of these plastic containers: “Lock and Lock.” they are absolutely air tight, liquid tight, dishwasher and microwave safe! Don’t economize with another brand. Get the real thing. They are available on Amazon. We have all sizes. When we come home from the store with chips, cereal, rice and any dry goods, they promptly go into these containers. Don’t fool yourself into thinking that unopened cereal boxes, bags of flour and things like this type will suffice. Wrong! Is it a hassle to do all of this all the time? You bet. Is it absolutely worth it? You bet! Also, with these “Lock and Lock” containers you can be confident that they will stay closed, no matter what. Dropping them isn’t a problem…and they never leak. (Yep, we use ’em for liquids and leftovers as well.)

I prepare lots of soup and freeze portions-for-two in plastic “Lock and Lock” containers. I’ve always got a good meal on hand. I won’t even eat Campbell’s soup. It’s just sodium in colored water!
Moving right along, what about mice? God, if someone had told me when we purchased our first RV that we’d for sure from time to time have mice, I’d probably reconsidered and bought a boat. However, no one did tell me and sure enough, we’ve had some rodent invasions. Think about it: When it’s cold and food is scarce, why wouldn’t these pests come on inside for warmth, food and even to nest! Depending on whether you have pets as room mates, certain bait would be unsafe. We use the sticky pads, so when the critters step on the pad, there walking days are over. We put these traps under the sink, in the TV/Stereo area above the driver’s seat and in other spots we’ll remember. We check periodically and that’s that. The suggestions that if you secure your RV and seal off any potential access points are useless. It’d take a month of Sundays and a half dozen workers to even come close. Think about all the potential entries and how tiny they can be to allow entry.
Natural Catch Fruit Fly Trap
Here’s a common dilemma and an easy solution. Fruit flies. Especially in your RV where refrigerator space is limited, you’ll need to keep fresh fruit and vegetables on the counter. That will attract fruit flies and those litter buggers multiply fast. They are so small you can’t get ’em with a fly swatter but they’re big enough to drive you nuts! Buy “Natural Catch Fruit Fly Traps” from Amazon. They are safe, non-toxic, easy to use and effective. For about $10.00 your problem is solved! You can also purchase an add-on “Soapstone Box” if you want to conceal your traps and dress up your kitchen counter.
Next is a suggestion that is admittedly somewhat controversial but I’ll make it and let you decide. There’s a spray product called “Home Defense” sold at Home Depot and lots of other places. Immediately after we arrive at a new site we spray the entire perimeter of our rig. The stuff works and usually we “win” the battle with the bugs that are inevitably in the neighborhood and wanting to join us. You can also use comet and sprinkle it around your tires but it just doesn’t come close to working as well as “Home Defense.” Finally, we’re careful to keep our windows and screen door closed to keep the flies outside. We also don’t allow dirty dishes to accumulate in the sink. By following all these suggestions your life on the road and in the kitchen will be much more pleasant than if you don’t.
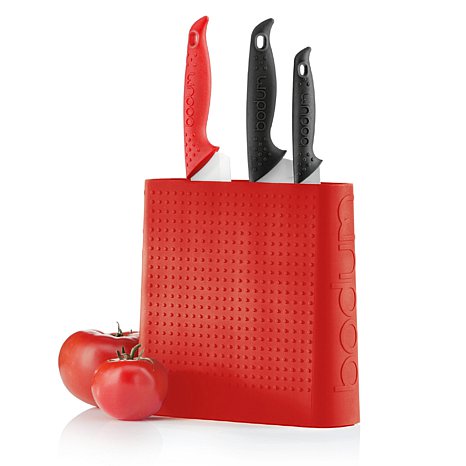
Bodum Bistro Universal Knife Block. About $40.00.
TIP NUMBER 9: KITCHEN KNIFE STORAGE. With such limited kitchen space in your motorhome, where do you store your kitchen knives without compromising the sharp edges when they’re tossed in a drawer. And who has an extra kitchen drawer anyhow? I sure don’t. Here’s the solution: Use a Bodum Bistro Universal Knife Block. The myriad fine plastic sticks allow secure storage for lots of knives without dulling them. And the block is thin…it takes up very little space. I keep mine in the cupboard under the kitchen sink, so it’s easily accessible yet doesn’t need to be moved when driving. One less thing to do before getting underway. Available from Amazon in a selection of colors, about $40.00.
TIP NUMBER 10: CONSERVE WATER. When you’re limited to the water in your tank, the length of your  stay is dependent on how long your water supply lasts. It’s retty simple…you can stay in that beautiful spot of your own longer if you use your water sparingly. Some ways to conserve water while you’re boodocking are obvious. Others not so much. Each little bit of conservation is important. We’ve become so proficient that we can camp independent of shore power, sewer or city water for a week. Believe me, that requires some effort and some thought. Here’s how we conserve in the kitchen. First, we use lots of disposable paper products. I know, what about saving trees? Screw it for the time being, you tree-huggers. Remember, it also takes energy to heat the water to wash the non-disposable dishes, so there! Also, we’re always sure to pack-out our trash…always. Second, we consciously think about using water when we’re boondocking. As far as cooking, maybe you can steam an item rather than boiling it. Or maybe you’ll just have fruit, crackers and cheese for dinner…that doesn’t require even a drop of water to prepare. The point is this: Most of us have always had such an uninterrupted plentiful source of water that we’ve never really given a second thought to conserving it in the kitchen. With a little practice, you can still prepare good meals while camping without a hookup…it just takes some thought. Do you know how little water it takes to wash a couple of dishes and some flatware if you’re stingy? Not much. Anyway, you get the idea…be careful with your water and you’ll be able to prolong your stay in that special site. Leaving before you really want, or packing up for a mid-stay trip to the dump, is no fun.

ThermoWorks Super Fast Thermapen. About $100.00. It’s pricy, but accurate. The others are a waste of money!
TIP NUMBER 11: USE A MEAT THERMOMETER. It amazes me how many chefs fail to use a meat thermometer. I hear these complaints all the time: “Darn! I overcooked the steaks.” There’s no need for that to happen. Here’s the deal: There are two basic methods to test for how done your meat is while you are cooking it – use a meat thermometer or press on the meat with your fingertips. The problem with using a thermometer is that when you poke a hole into the meat to read it, juices can escape…juices that you would rather have stay in the meat. For this reason most experienced cooks rely on a “finger test” method, especially on steaks. (Whole roasts are better tested with a thermometer.) You can read about how to do the finger test, but the problem is that it takes a good deal of practice to perfect it. With the cost of a good steak or beef roast these days, those practice sessions become very pricy. So my recommendation is to consult a meat temperature chart, and use a good thermometer, at least until you can learn the other test. So what kind of a thermometer should you use? There’s really only one choice: ThermoWorks Super Fast Thermapen Instant Read. Take it from a guy who’s wasted a lot of money on worthless thermometers, just spring the $100 bucks for a ThermoWorks and save yourself a lot of grief.
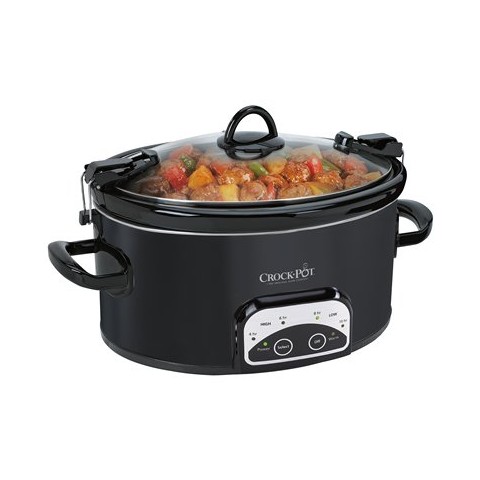
Get a crock-pot with the locking lid. (See the clasps?) Just make sure you don’t lock it while cooking or you could have a disaster on your hands!
TIP NUMBER 12: YOU’LL WANT A CROCK-POT. A crock pot is invaluable at home, but it’s even more a necessity in your RV. Granted, you’re not going to prepare a gourmet meal by tossing all ingredients into a pot at the same time, but having a crock pot on the road allows you to cook and play at the same time. Alternatively, you can cook and drive at the same time. We occasionally run our generator while driving for either air conditioning or heating. And while you’re doing so, might as well have your crock pot working for you as you travel, so when you arrive at your destination dinner will be ready. Just put the crok-pot in the kitchen sink as you’re driving. Note: Make sure your crock has an auto-off feature so if you don’t return from the day’s activity as early as planned you’re not going to be greeted with a burned dinner. Also, get one with the “locking lid” for spill-free travel, so you can safely take your meal to the pot-luck dinner in the clubhouse. Just make sure you don’t lock the lid while cooking. Read the package insert.
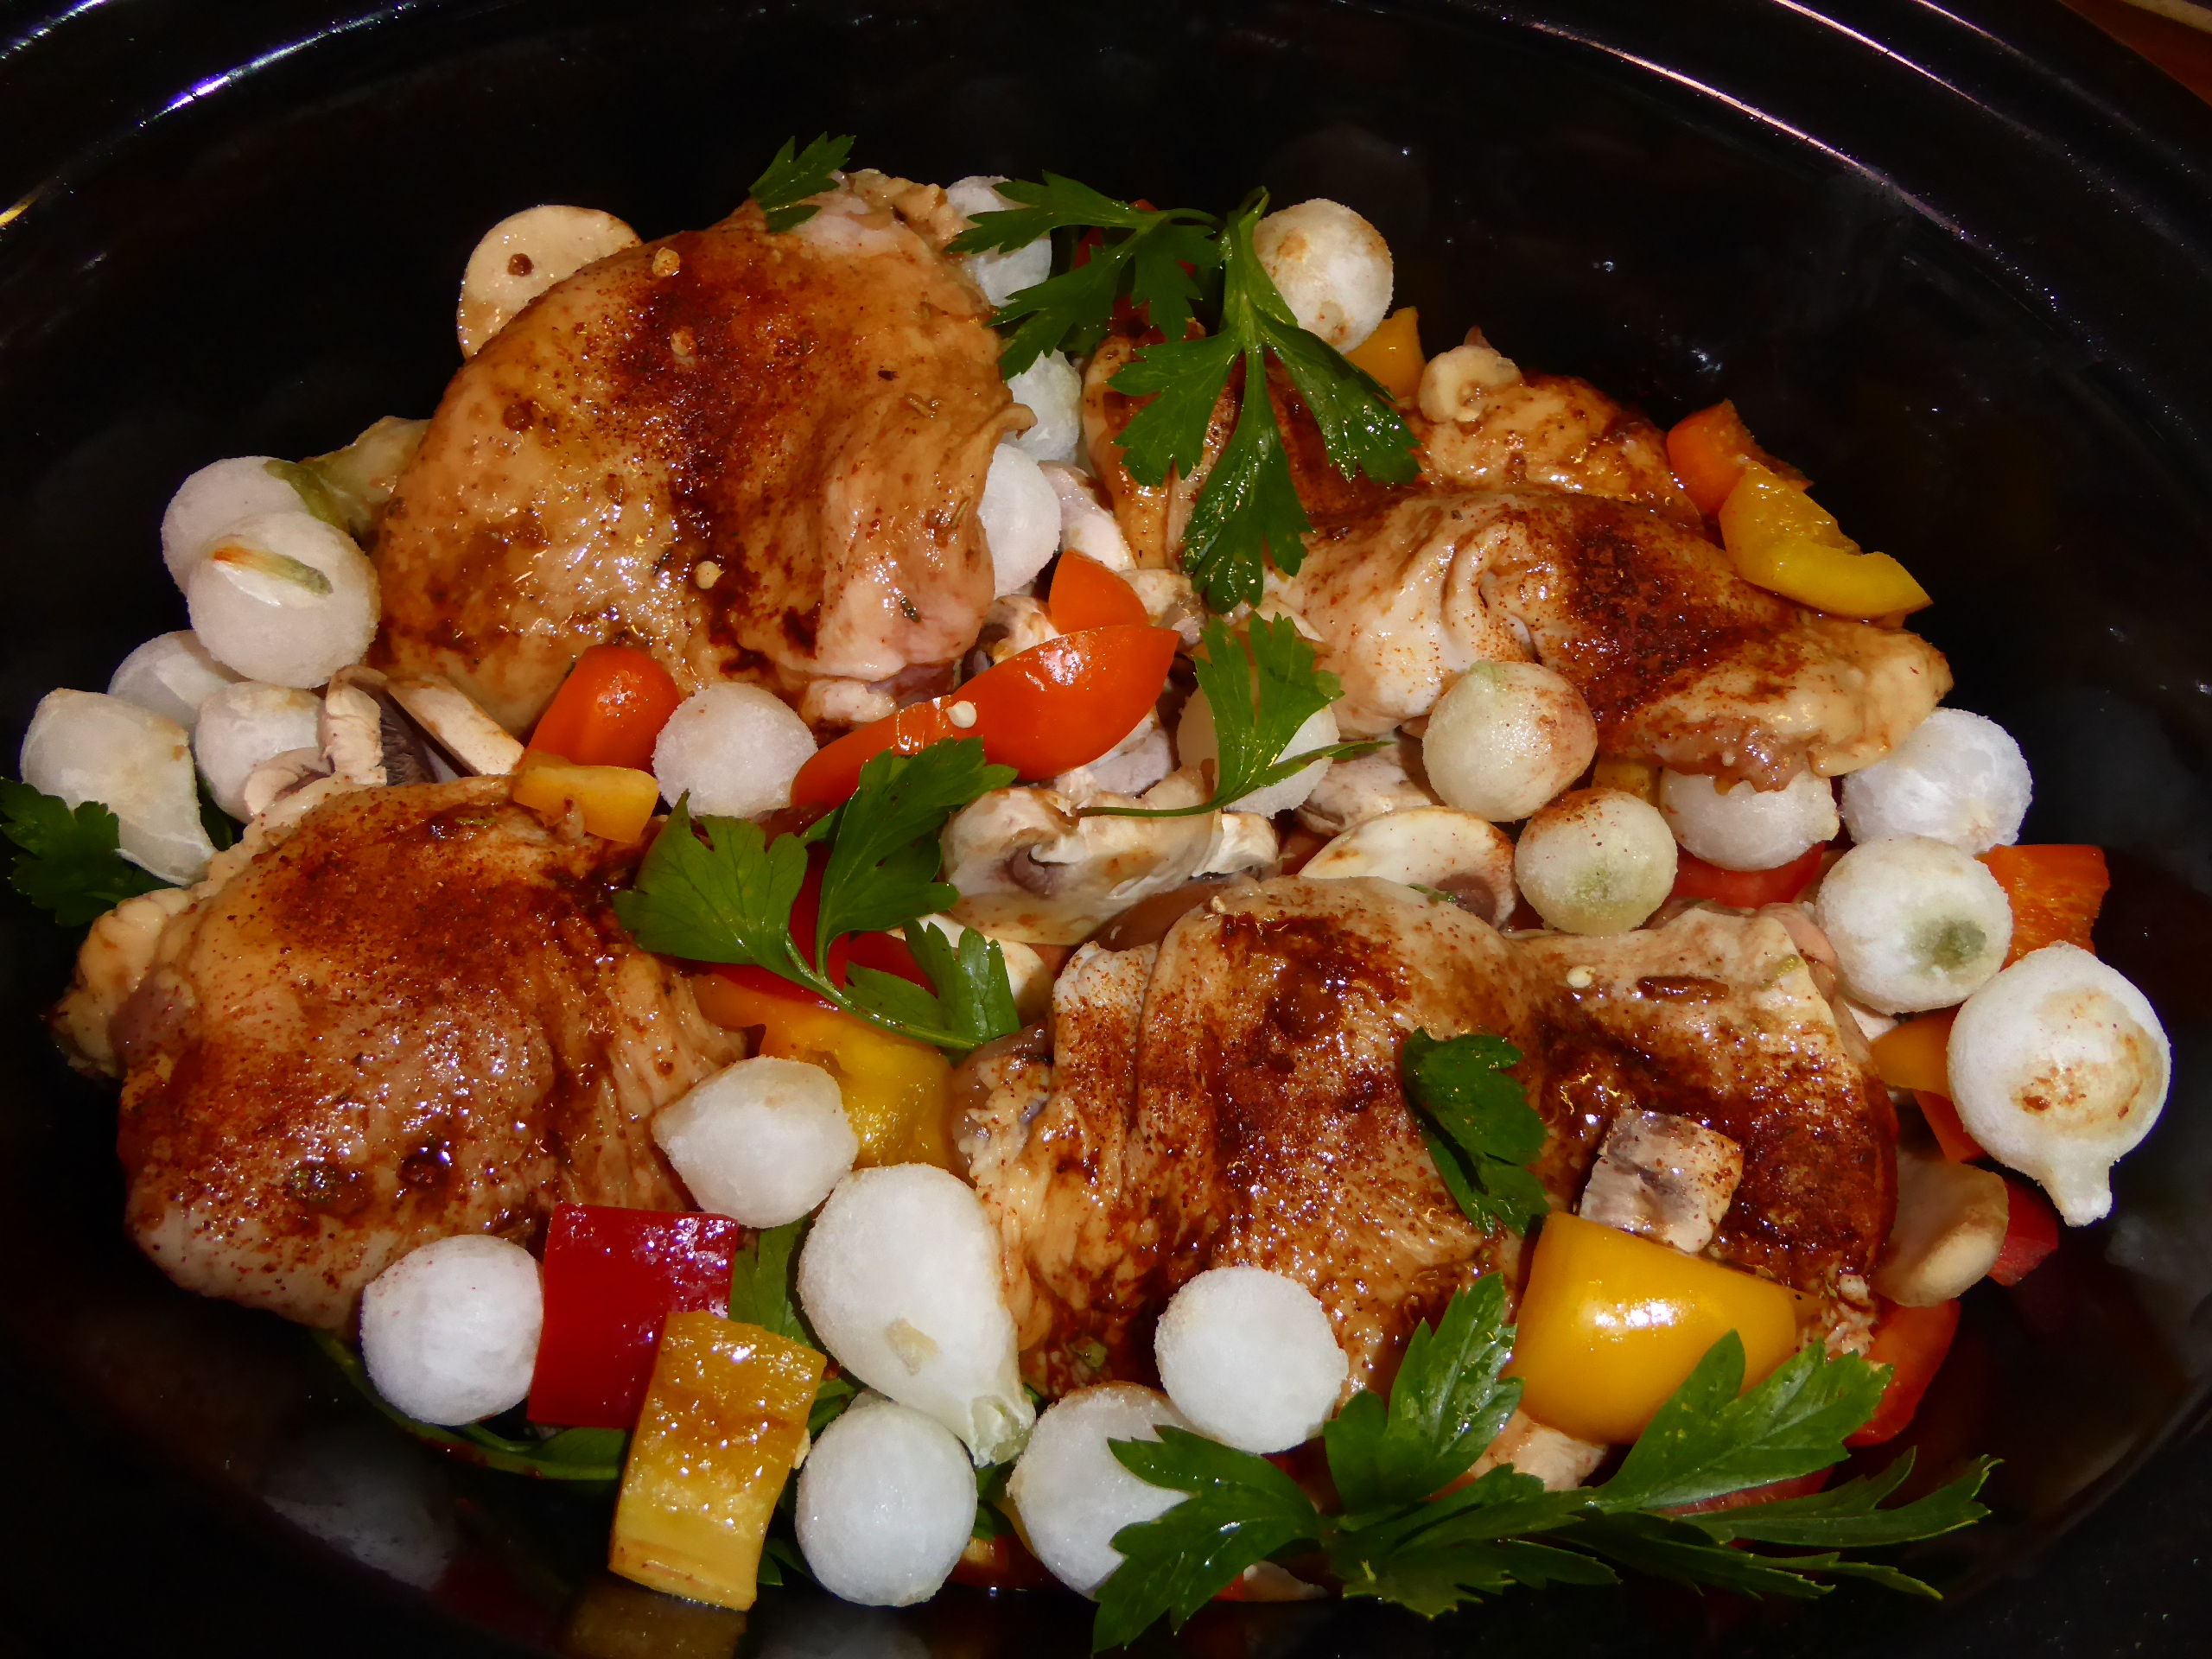
Who needs a recipe? I de-boned some chicken thighs, seasoned them to add some color and tossed them into the crock, atop onions and carrots. I added some coarsely chopped bell peppers, some frozen pearl onions and some flat-leaf parsley to jazz things up and, voila! Serve over a bed of 90 second micro-rice and you’re done. Now that’s easy…really easy. Hint: If you spray your creation with cooking spray before you lug it next door to the pot-luck dinner, it’ll look even better when you arrive.
TIP NUMBER 13: Coming soon.